Help
ECNG Online Stores is only accessible to Level 1 students at this time.
Borrowing Parts
- Search or browse the inventory listing and add items to your cart. You must be signed in to see all eligible inventories and to access your cart.
- Set the item quantities in your cart and then click the ‘Check Out’ button. Note that availability is subject to current inventory in stock and that certain items have limits on check out quantities. If you need a larger quantity than a limit allows speak to the storekeeper after placing the loan.
- Confirm the items and quantities, select the course that the items are for and click confirm. Your loan request will be dispatched to the storekeeper.
- When your loan is ready to collect you will receive a notification via email. Be sure to check your junk mail folder in case the notification email winds up there. You can also check the ‘My Loans’ area when signed into the website. The loan status will change from ‘Submitted’ to ‘To Collect’.
- Collect and sign for your parts.
- Return your parts by the due date. The loan due date is displayed in the My Loans area.
Detailed Help
Contents
The Home Page
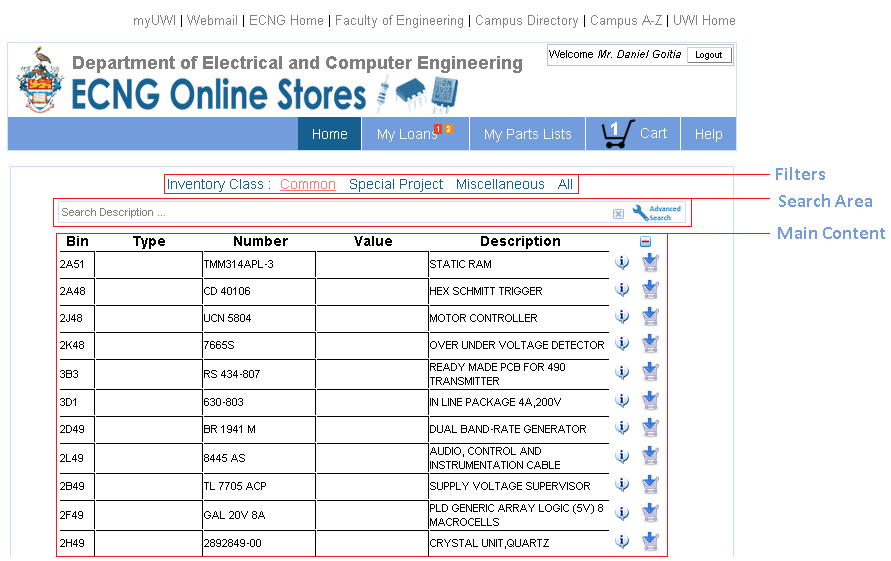
Navigation
The home page has three (3) major elements:-
1) Main Content
2) Search Area
3) Filters
Main Content

The main content area has four (4) main elements while navigating this section of the home page.These elements are:
Inventory Items - This is a listing of all the items that are presently being viewed by the user. Any search performed alters this list to reflect the information entered into the search.
Add to Cart - This clickable option allows the user to add an item to the cart to create a loan.
Item Details - This is a clickable option that opens an overlay dialog which diplays more information about the inventory item.
Expand and Collapse List - The list of inventory items can be converted to a compact and scrollable list to allow the search bar and other controls at the top of the home page to be viewable.
Add to Cart
Adding an item to the cart affects the cart preview icon. It indicates when an item is being processed to be added to the cart. The process is showed as follows:
The cart previewer contents also changes when the hovered over when and items have been placed into the cart.

Item Details
When this option is selected, more information about the selected item is displayed.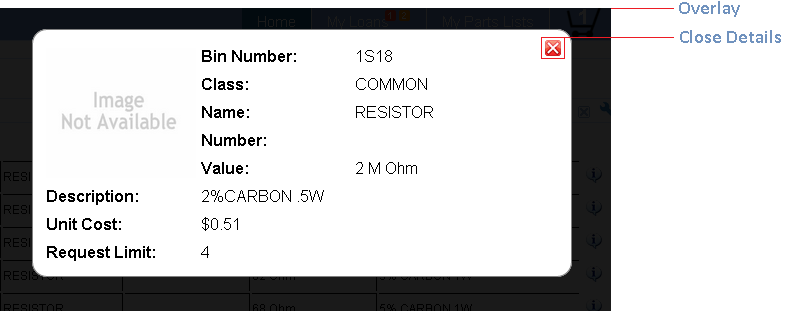 Close Details - The dialog displayed with the addtional information about the selected inventory item would be closed.
Overlay - This closes the item details dialog once it is clicked.
Search Area

The search area has three (3) main elements while navigating this section of the home page.These elements are:
Simple Search Area - This search allows the user to search the description of the inventory items under a particular filter selected.
Cancel Simple Search - The result of a simple search is reset to the default page loaded.
Advanced Search - This is a clickable option that opens the advanced search dialog area.
Advanced Search

The advanced search area has three (3) main elements while navigating this section of the home page.These elements are:
Input Fields - Fields for searching by Bin number, type, part number, value and Description. Fields left empty will be ignored.
Clear Advanced Search - This clears all input fields and resets the advanced search.
Close Advanced Search - This switches back to the simple search.
Filters

The inventory filter easily allows a user to see all the items of a particular inventory class.
The filter allows the inventory items to be filtered via four catagories. These catagories are:
Common - all users may borrow these items.
Special Project - Items procured for previous ECNG 3020 projects. Current ECNG 3020 (final year) students have access to these.
Miscellaneous - Miscellaneous items such as tools, laboratory equipment and office supplies used by the laboratory staff.
All - All items in a single listing. The items viewable by a user is based on their position in the department. This includes item they can only view as well as the items they can add to a loan. The items that can be viewed or loaned to users are as follows:
- Year One Students
- Year One students do not have an 'All' option since they only have access to the common inventory.
- Year Two Students
- Viewable Items - Common and Special Project Inventory Items
- Loanable Items - Common Inventory Items
- Final Year Students
- Viewable Items - Common, Special Project and Miscellaneous Inventory Items
- Loanable Items - Common and Special Project Inventory Items
- Post Graduate Students
- Viewable Items - Common, Special Project and Miscellaneous Inventory Items
- Loanable Items - Common, Special Project and Miscellaneous Inventory Items
My Loans
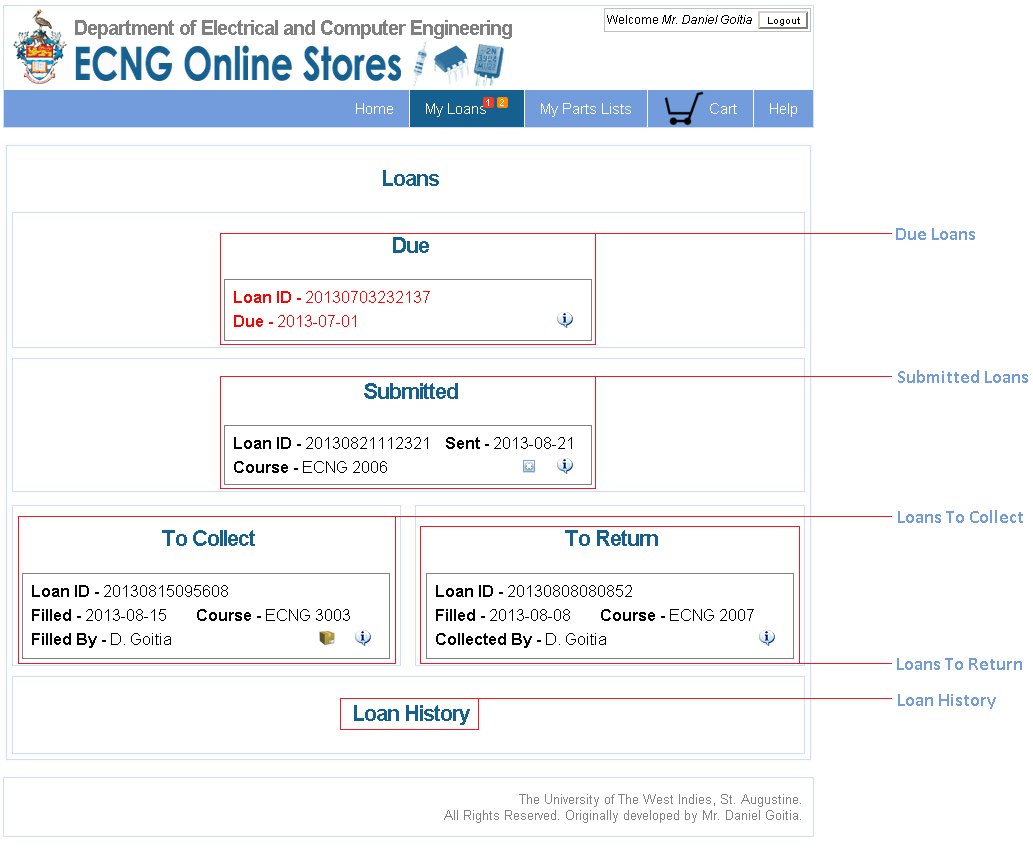
Navigation
The my loans page has five (5) major element while navigating this page. These elements are the:-
1) Due Loans
2) Submitted Loans
3) Loans to Collected
4) Loans to Return and
5) Loan History
Due Loans
This section displays the loans that has passed the due date. This section only appears when the user has loans over due.
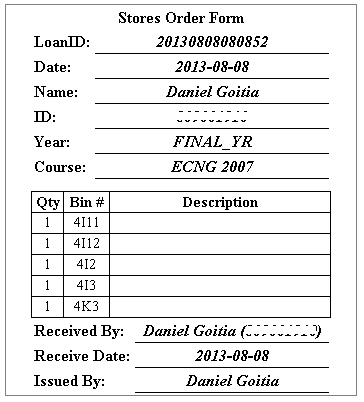
 The loans details opens a dialog as shown below
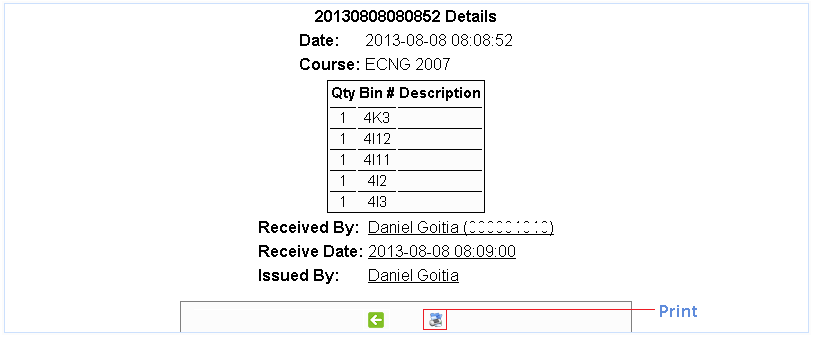 Click to print button to display and print a stores order form for this loan.
Submitted Loans
This section displays the loans that have been sent to the Stores Manager.
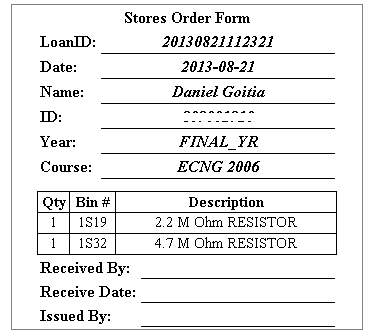
 The delete loan option removes and deletes the loan from stores manager's queue to fill and the loan details opens a dialog as shown below
 The delete loan option withdraws the loan request.
The print button creats a stores order form for printing.
Loans to Collect
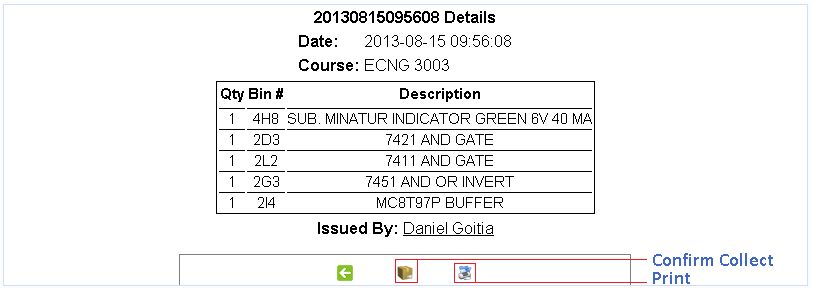
The confirm collected option removes the selected loan from the collected loan queue to the returns loan queue. This section displays the loans has to be collected by the user.
 The confirm collected option removes the selected loan from the collected loan queue to the returns loan queue. The loan details option opens a dialog as shown below
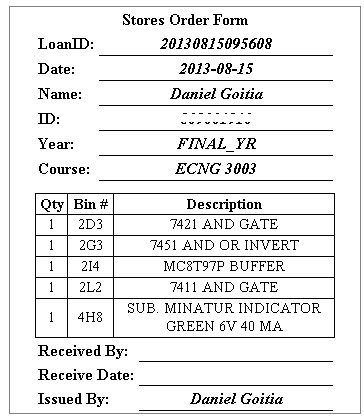
 Provided that a user selects the print option, a stores order form is created to be printed.
Loans to Return
This section displays the loans has to be returned.
 The loans details opens a dialog as shown below
 Provided that a user selects the print option, a stores order form is created to be printed.

Loan History
The user loan history is closed by default, when clicked it opens to display the archived loans. This section displays the loans that have been returned to ECNG Stores and have been archived. If the user has no archived loans, no table would be displayed .
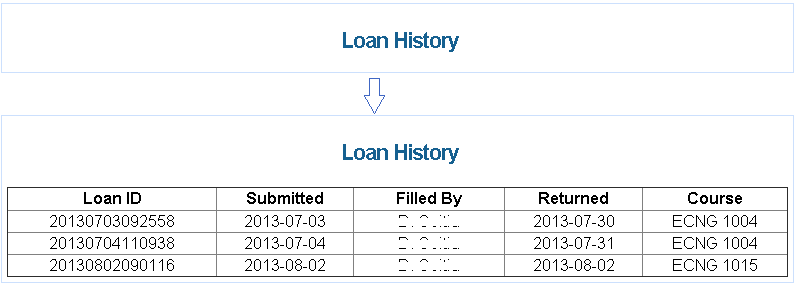 The archived loan are opened by clicking on one of the rows of the table. The following shows an opened archive loan.
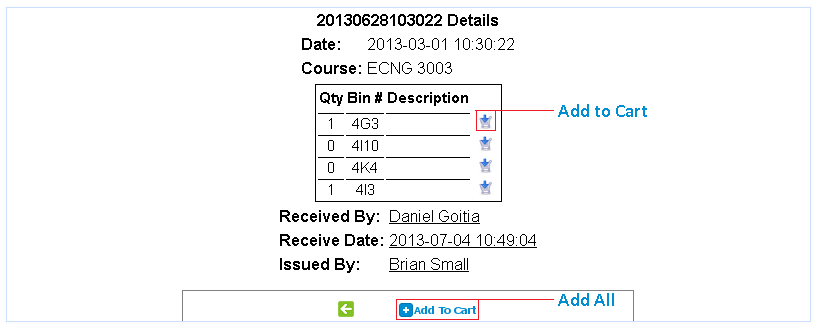 The add to cart option adds the individually selected item to the cart where as the add all option adds all the items of the loan to the cart.
My Parts Lists
Navigation
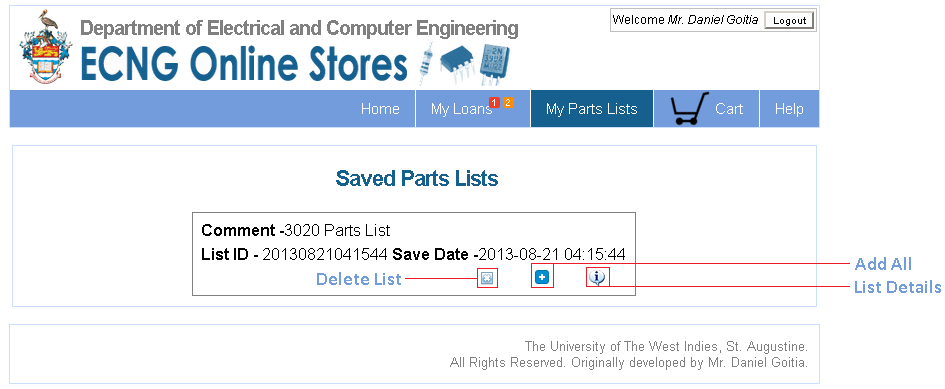
Each saved parts list has three (3) major elements - -
1) Add All - add all parts in the list to the cart
2) Delete List - delete this list
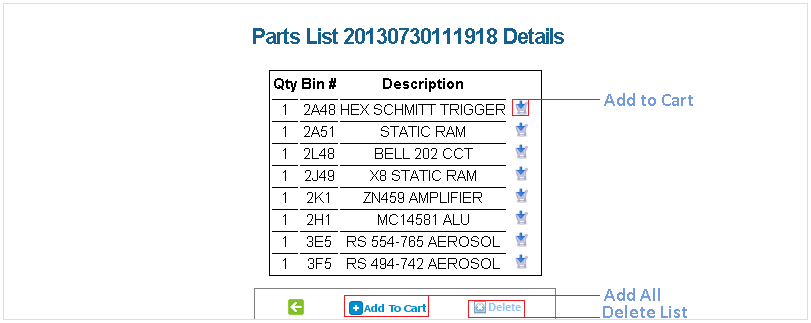
3) List Details - view the parts list and add individual items to the cart (shown below).
Cart
Navigation
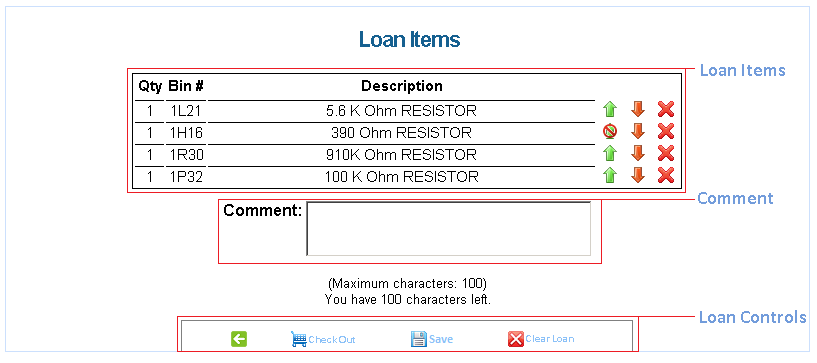
The Cart page has three (3) major element:-
1) Loan list,
2) Comment
3) Loan controls
Item quantities in the loan list may be adjusted using the increment, decrement and remove buttons as illustrated below.

The comment area allows the user to add a comment to attach to the loan request.
 The loan controls have three (3) major functions, to check out a loan, save a parts list or to clear an active list of items.
Creating a Loan
To create a loan the following steps should be followed:-
Step 1 - Select the item you want to add to the cart by clicking on the add to cart ( ) option of the item .
Step 2 - Select the "Cart" ( ) option listed at the top of page to which will redirect you to the page shown below.
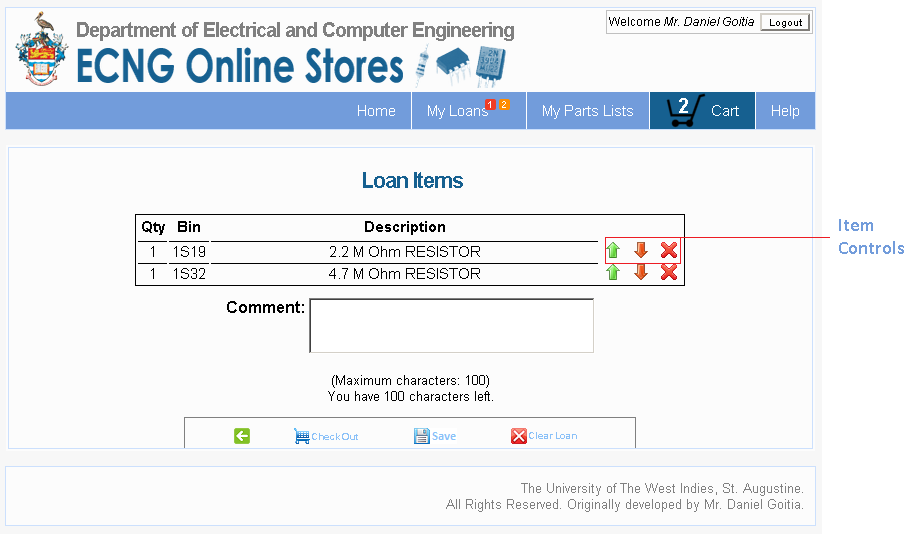
Here you can change the quantity of the items in the cart with the Item Controls. Once the quantities have been adjusted as desired the "Checkout" ( ) option should be selected to proceed to the next step.(Adding a comment is optional)
Step 3 - Once the items have been checked out, the following window will open.
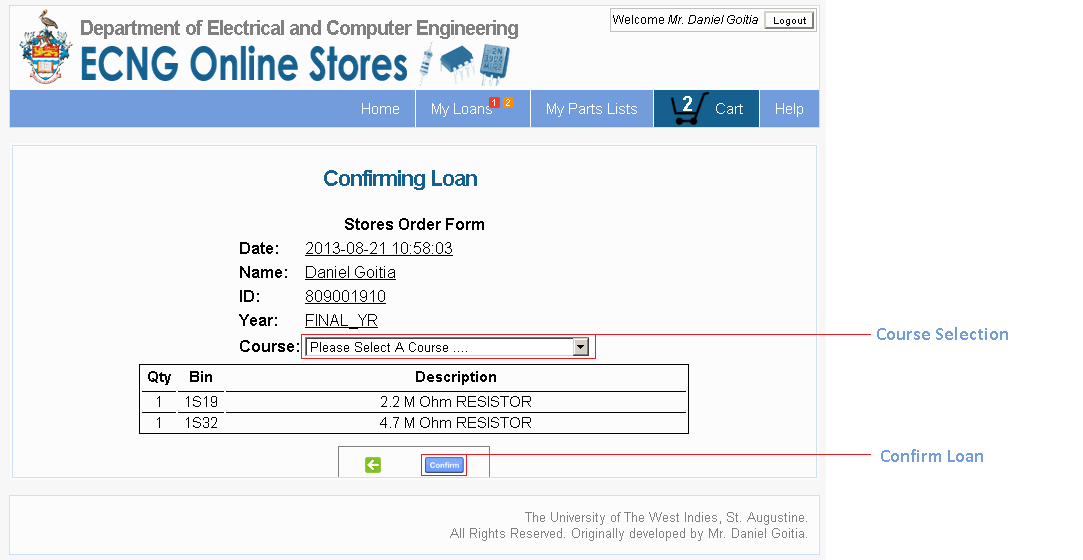
You have to select a course from the "Course Selection" before you confirm the loan to be sent to a Stores Manager to fill it.
Step 4 - Provided that the loan was sucessfully confirmed, the following message will be displayed
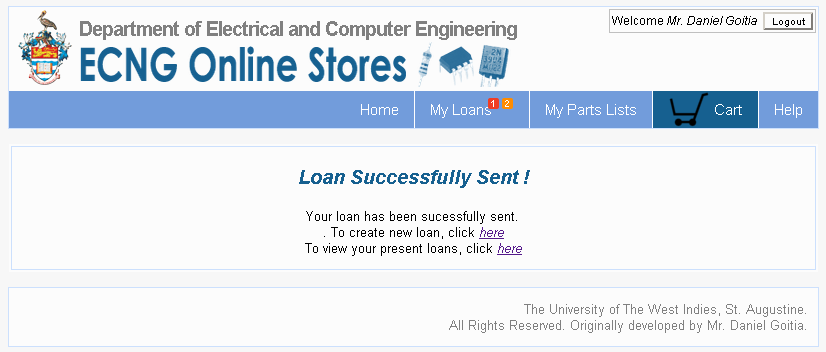
This message also indicates that you have successfull created your loan.
Saving the cart to a parts list
To save a the contents of the cart the following steps should be followed:-
Step 1 - Select the item you want to add to the cart by clicking on the add to cart ( ) option of the item .
Step 2 - Select the "Cart" ( ) option listed at the top of page to which will redirect you to the page shown below.

Here you can change the quantity of the items in the cart with the Item Controls. Once the quantities have been adjusted as desired the "Save" ( ) option should be selected to proceed to the next step.(Adding a comment is optional)
Step 3 - Once the items have been checked out, the following window will open.
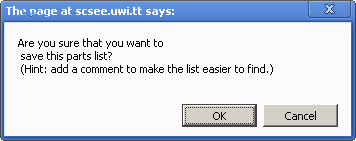
You have to confinm the action before it is saved.
Step 4 - Provided that the saved parts list was sucessfully confirmed, the following message will be displayed
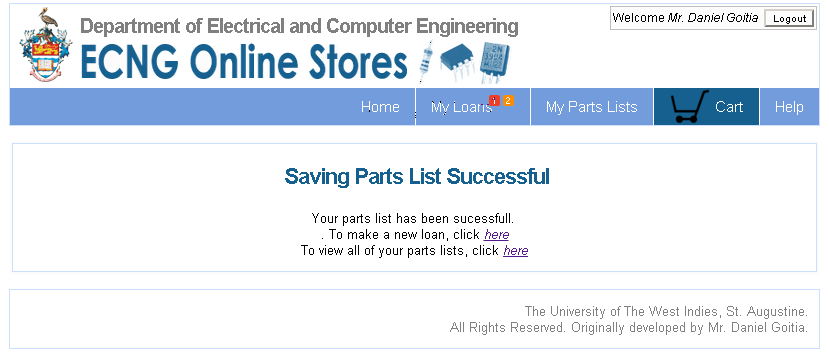
This message also indicates that you have successfull created a new parts list.

